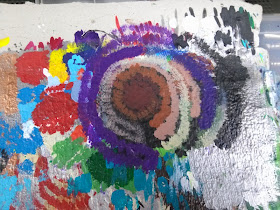
Decided Deathwing Land Raider would have The Rock painted on it with El'Jonson's sarcophagus surrounded by Watchers in the Dark.
 |
| Might have wondered why this side hasn't been painted. Here it is. |
Painted for about 4 hours on Sun.
Giving credit where credit is due: Would like it noted Coldflame1987 from deviantART was my source of inspiration.
 |
| Wet pallet, check. |
 |
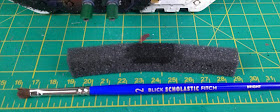
| Saw this piece of foam at Fantasy Flight and swipped it. Figured it would be helpful with stippling the black. |
 |
| Matt Black on wet pallet and foam. |
 |
| Turns out it was a waste. Would've only lead to majour mess. Grabbed some pluck foam from Army Transport cases. |
 |
| Much better. |
 |
| Ok, big mistake. Should've just used my stippling brush from the Eldar skimmers. |
 |
| Finally receives the coverage it should. Canvas for mural done. |
 |
 |
| Stippled Vermin Brown. |
 |
| Knarloc Green. |
 |
| Stipple brush wasn't quite right. Gave it a proper cleaning with brush cleaner and looking almost like new. More importantly working like new. |
 |
| When stippling grab some paint with the brush. Then tap it to remove paint from the brush. This allows the paint to not be so thick. Allows for a light finish. |
 |
| Rotten Flesh and Tallarn Flesh for nebula on right side of sponson. |
 |
| Adding some shadows? Supposed to be shadows. Storm Blue and Liche Purple. |
 |
| Felt it was too bright. Wanted to dull the nebula. Stippled Matt Black over it. Much better. |
 |
| Paints used sans Storm Blue. |
 |
| Star time. Little dot of Blazing Orange. |
 |
| Highlights with Golden Yellow and Flash Gitz Yellow. |
 |
| Mixture of 1:1:3 Blazing Orange, Golden Yellow and Flash Gitz Yellow. Using this for the gas from the exploded star. |
 |
| 3/0 brush stippled waves of gas. |
 |
| Added more Flash Gitz Yellow to mix. |
 |
| Highlights added from the mix. Added some stars |
 |
| Figured it was a bit bright. Added some shadows to the nebula. Scab Red for shadows. |
 |
| Still found it a bit bright. Decided to added one more layer of shadow. Actually liked it before the second layer of shadow. Something learned for next time. |
 |
| Dark Angels Green for gas infront from nebula. |
 |
| Matt Black for middle of gas infront of nebula. Light from nebula can't pierce through the middle. Only the edge. |
 |
| There was too hard of a edge between Matt Black and Dark Angels Green. Want to soften it. 3:5 Bad Moon Yellow and Dark Angels Green for the medium. Blended nicely. |
 |
| Time to add some stars. 1:5 Lightning Blue and Matt White. Also figured at this point there were too many stars. Particularly on left side. That string in the middle. |
 |
| Much better. As they say less is more. At least for most things /wink. |
 |
| Celebratory cider for clearing that hurdle. |
slainte mhath


No comments:
Post a Comment