This blog has been retitled. Appropriately so. Please for the love of the Emperor or Ynnead measure twice cut once!
 |
| The sprues are beautiful. |
Tomb Spiders from 10 years ago.
Wanted them to look worn down. Not as pretty as the rest of the Necrons. Drybrushed some Bestial Brown and Beaten Copper across the plates.
Cut the bits I'm using out of the sprue. Now to clean them up and put them together. There are going to be a lot of pics. Effectively a stage-by-stage process of it coming together.
There are plenty of options how you want your spyder to look. Very similar to the Dark Eldar Talos. Which I loved putting together because of the customisation. As Jes from GW intended the modeller could be a haemonculi while constructing his Talos. I Loved putting those guys together. Perhaps someday I will throw up the pics of my Talosi coming together.
 | ||
| Thorax |
 |
| Front right leg. |
It was at this point I was so happy how GW made this model. I want my Spyder legs to move and I realized how I could do it without cutting up legs or using magnets. It's going to be awesome. Just wait. I'm sure you'll love its simplicity.
 |
| It was at this point I should've taken a clue from the third leg. Nope not me! I'm a man I don't need think ahead. |
At this point I realized there's a stylised "I" near the elbow. Perhaps Canoptek Spyders are spies for the Inquisition. Hey, don't judge me. Weird thoughts go through our head when we're modelling.
 |
| Top right armour of thorax. |
 |
| Top left armour. |
 |
| Abdomen |
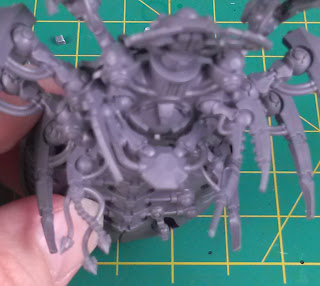
Very quickly I will be coming up to my mistake with this model. Guess I was having so much fun I wasn't considering a problem our present science has.
For some reason two objects cannot occupy the same space at the same time. SpaceX can you remedy this for me? I'd appreciate it. Get back to me.
Yeppers. Folks, measure twice cut once. Please save yourself the trouble. Thank goodness I made this mistake. Hopefully this will be helpful for someone who is thinking of buying Spyders and have read this WIP so they don't do the same thing I did. Hopefully someone has the foresight to not make this mistake at all. Not me! That's how special I am. /wink
So I can begin to bend legs so the abdomen will connect. Its a good 2mm from its connection point. Yeah. Superglue has already done its job. If I was using GW Plastic Glue I could possibly do it. I followed Joe's suggestion with Loctite's Gel Control Super Glue. That stuff is awesome. It holds fast. Very little drying time. What do I do?
 |
| "We're Americans, we don't quit just 'cause we're wrong! We just keep doing the wrong thing 'till it turns out right!" |
AH! Love it! Time to fix it. Took me about 15 seconds. Thanked my creativity with a sip of Leinenkugel's Summer Shandy. Back to work, pal.
 |
| Thank you, Mr Pinning! |
 |
| This drill has helped me more than any tool I have. |
 |
| Tada! (a Magazine made by and for gay magicians [two points if you know the reference]) |
 |
| Yep that is my fix. Pin, baby, pin. |
 |
| Time to scratch its belly. It loves it when I do that. |
 |
| Gloom Prism to take advantage of wound allocation. At least in 5th ed. |
 |
| Done. Onto second spyder. |
Very quickly going to experience another problem by assembling these two pieces together when I want moving legs. grr, sigh. You live, you learn, you get loves.
I believe GW had the idea of movable legs when building this model. The armour that goes on top of the thorax makes a place for the leg to go into but not fall out easily. Leg will still fall out. So I used some super glue and moved the leg around for a bit when connecting to the sockets. All the legs move except one which I thought super glue was done curing nope. Stuck leg. 7 out of 8 legs move . Not bad for first attempt. No pics of those yet because at this point I was still working on perfecting how to make legs movable. Without falling out.
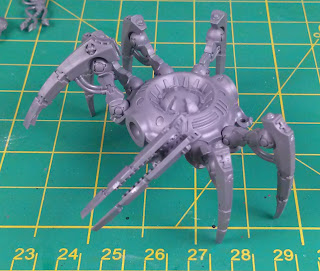
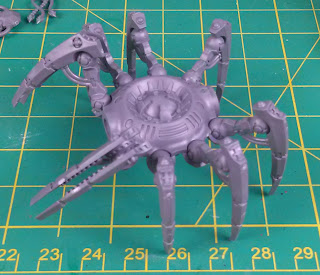
Here's a pic of the first and second spyder. You can see the bottom is the one where the legs stop the abdomen from connecting. Second one turned out much better. Though had a problem with the legs connecting.
 |
| Two out of four completed. |
New way to have movable legs. As I did with previous spyder I drilled out the dimple where the legs peg goes. This helped with previous spyder. However I did the drilling after everything was assembled so there was a lot in the way. This time drill the thorax out first then start putting legs on.
Then drill a hole in a leg. Line up the leg how you want to look on the model then look through the drilled hole on the socket. Make a guess where the pin will go into the leg.
Fish your paper clip through and apply super glue to the end that is going into the leg ball portion of the ball/socket joint. Maybe a little bit more so the leg will be glued to the socket.
Then move leg into socket and move leg back and forth while super glue is doing its work. A little trick from Armourcast. If your titan models weapons don't stay in position apply super glue to the joint and work it back and forth til it grabs again. Pic below is from me starting the other legs. I leave the paper clip in while I'm working the leg back and forth to avoid super glue holding in place.
 |
View under the thorax where you can see the paper clip pins.
Damn! That took a lot of time and energy. After I'm done with this spyder I decide I won't be doing that again. Figured I have two spyders where the legs move in different ways. Others I will glue them into different positions.
Here you can see all the paper clip/pins.
Wanted this one to seem like it was aiming left.
 |
| Three out of four completed |
This one I cut off the pegs on the arms and glued them into position.. This one, like the previous, I wanted the spyder to feel like it was going in a certain direction. This one aim for the right. Previous aiming left.
 |
| Four out of four completed. Now just need to buy two more. |
That's it for construction so far. Now onto painting!
Adding to more pics. Remembered on Natfka's blog someone saying they think the new spyders are about the same size as Rhino. Here are size comparisons.
 |
| Razorback (Rhino) and Canoptek Spyder |
 |
| Canoptek Spyder and Tomb Spider |
slainte mhath


10 years later and I made some of the same mistakes :)
ReplyDelete