
 |
| Had these two boxes for about 2 months now. They've been begging for attention. |
These were a little more involved than I expected. Stole a Transdimensional Beamer off a sprue for Orikan.

 |
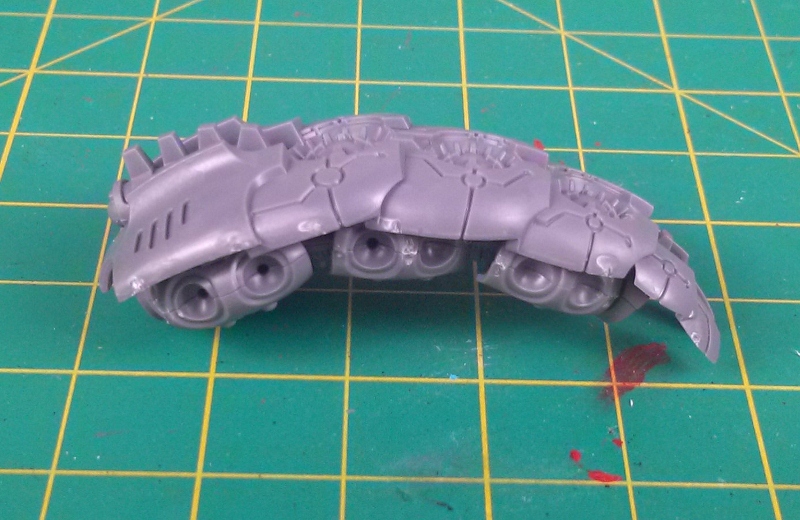
| Torso comes in nine parts making three sections. How they advise you putting together rear of the torso is a little weird. |
 |
| Front and middle assembled. Rear base assembled. |
 |
| Instructions tell you to do this. There is no notch to know you're securing the armour plate correctly. |
 |
| However if you look at bottom of middle plating you'll notice a notch where this can align up easily. |
 |
| Voila |
 |
| Tail two parts. Pretty easy. |
 |
| Bit surprised that it can stand on its own without a base. |
 |
| This is missing arm 8. Didn't see it in the instructions til I was gluing them on. |
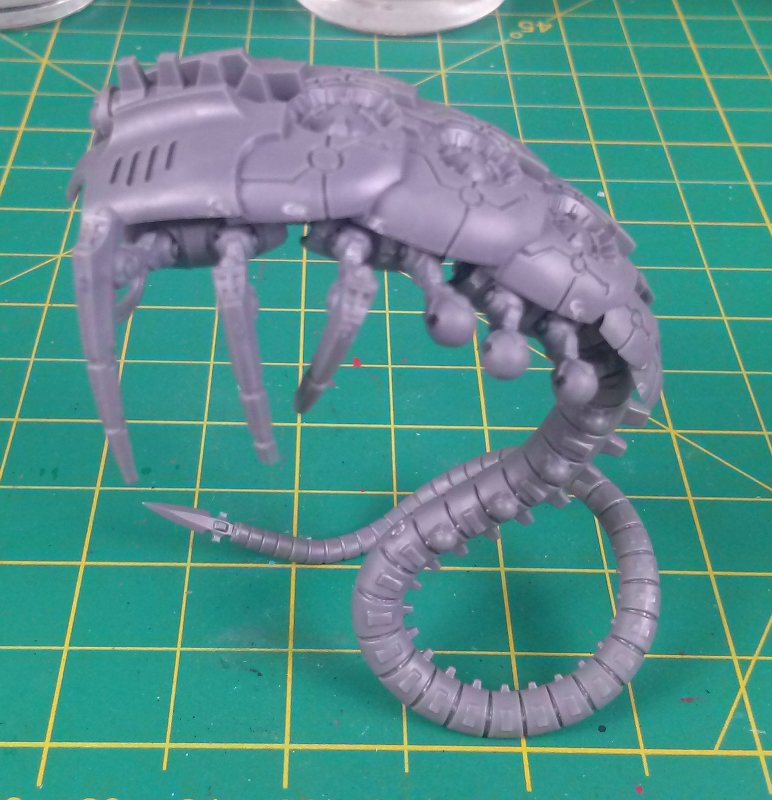 |
| Still able to stand without a base. Damn nice. Won't stand when you put front arm(s) on. |

 |
| Head and neck. |
 |
| Looking good. |
 |
| Whip coil assembled. |
 |
| 2 or 6 being worked on. |
 |
| Not sure how I feel about their different sizes. |
Can't put arms on right side yet. Need a Shrine of The Aquila for that. Stealing this idea from another blog. Will look great and get me majour points when displaying my army. I probably shouldn't even put them together at all like this considering what I'll have to do but I think it'll work.
slainte mhath
The real fun is painting them like the box like how i did :P
ReplyDeleteWelcome to H2Lat40k, JayDee. I can imagine. Though I think it would be easier to paint them like the box than to do the Necron glow inspired from Zali's work.
DeleteYeah. Its not "hard" but it takes a while to get it just "right"
DeleteI've learned that from attempting to copy GW mini's. Even their drybrushing takes a bit to get it just right.
Deletejust built six of them myself, had the same issue with the tiny rear torso piece.
ReplyDeleteThe rear part in the instructions made no sense because of the view. It provides a bottom view which doesn't show how the plating attaches to the body. Only after turning over the middle section that I thought they should change the instructions. Fun models to put together. Removing flash on the tail is a pain only because of the amount of time.
Delete